Claude Desktop setup
A few minutes of setup, then a tour of the main screen you will use every day
Claude Cowork is not a website you log into — it lives inside the Claude Desktop app, the same app that holds Claude Chat. Before anything else, let's get it installed, let it set itself up once, and learn the main screen you will use every day: the message box, the autonomy switch, and the model picker.
1 · Install it (a couple of minutes)
- Go to claude.ai/download and download the app for macOS or Windows.
- Open the downloaded file and install it like any other app, then launch it (Applications on a Mac, the Start menu on Windows).
- Sign in with your Anthropic account — the same login you use on claude.ai. That's it: Chat and Cowork are both inside this one app.
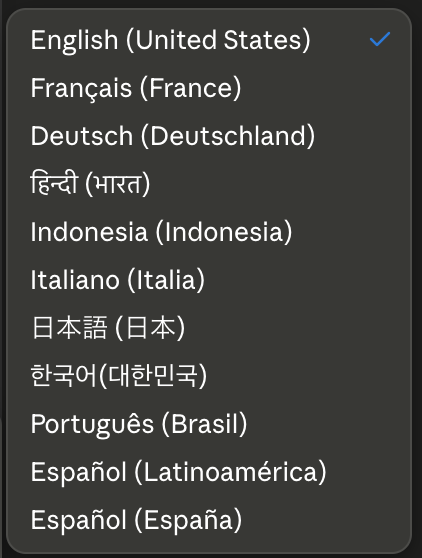
Prefer another language? Claude Desktop's interface — its menus and buttons — comes in a handful of languages. Open Settings and choose yours from the language list:
2 · The first time: Claude sets up its workspace
The first time you open Cowork, it builds a small, private workspace on your computer — an isolated mini-environment where it safely runs its tools (opening a spreadsheet, generating a PDF, and so on). You'll see a one-time "Setting up Claude's workspace…" progress bar. Let it finish; you only do this once.
3 · The project screen, top to bottom
Once you're in, you point Cowork at a folder to work in (that folder, the working folder, is the whole of lesson 1.3) and you land on the project screen. It splits into three calm regions.
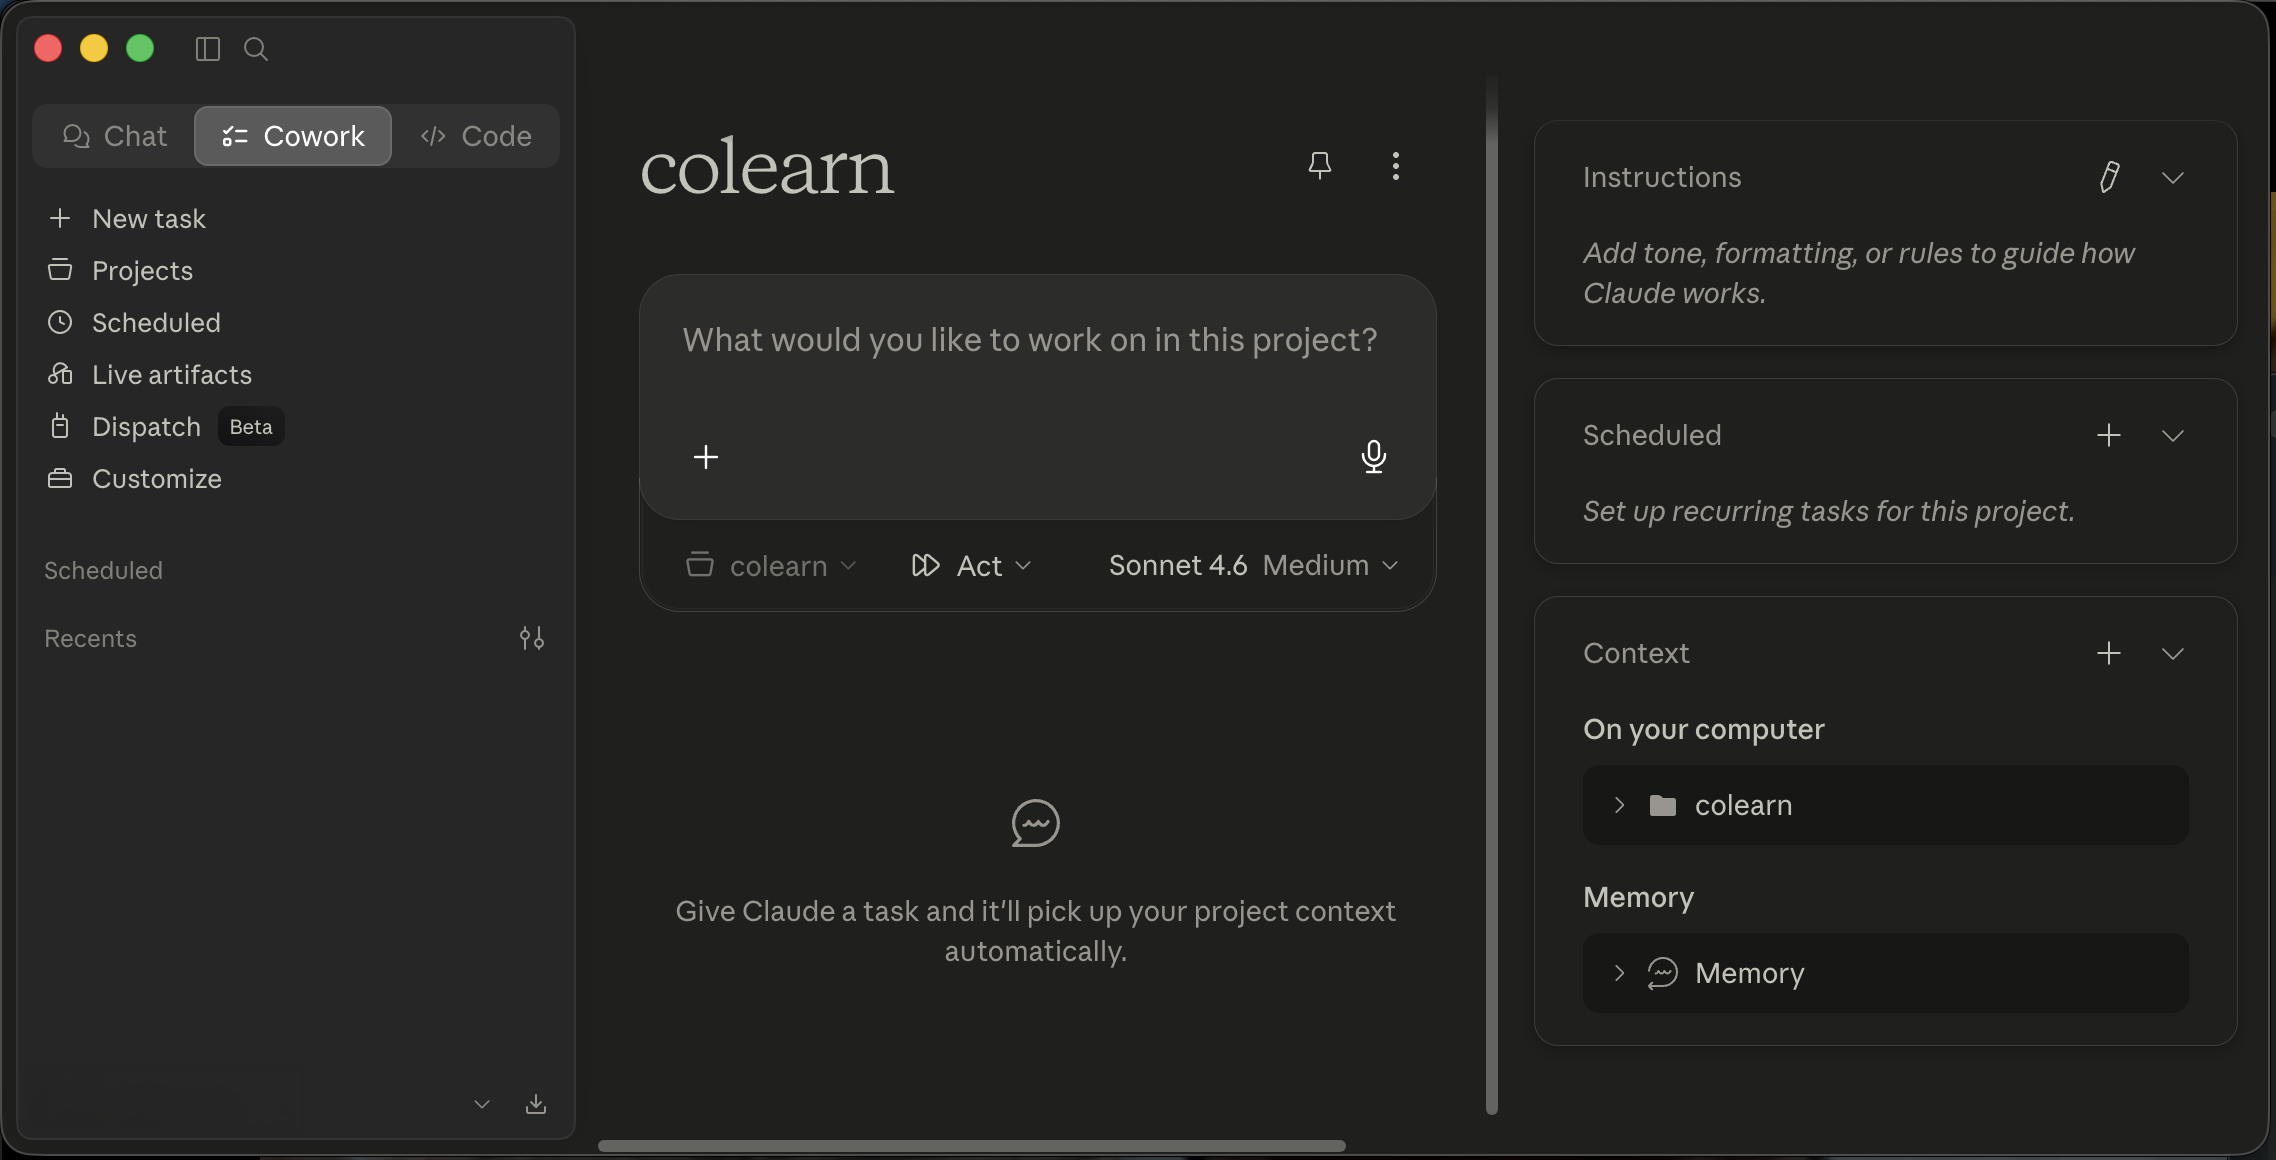
- Left rail — the Chat · Cowork · Code switch at the top (all three live in this one app; this course is the Cowork tab), plus New task, your Projects, and Recents. The rest of the rail is broken down item by item below.
- Middle — where you work. The project name sits up top (here colearn); under it, the message box "What would you like to work on in this project?" — you brief Claude here in plain language, just like writing to a colleague.
- Right rail — the project's context. Context shows the working folder on your computer (lesson 1.3) and the project's Memory; Instructions is where you set house rules for how Claude works here. You can ignore these at the start — Cowork "picks up your project context automatically."
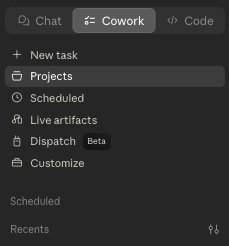
- New task — start a fresh task in the current project; one task = one focused thread of work.
- Projects — every project you've set up, each with its own working folder, instructions, and memory.
- Scheduled — tasks that run by themselves on a timer; you'll build one in lesson 2.7.
- Live artifacts — interactive pages Claude builds for you (a tracker, a dashboard) and refreshes when you open them.
- Dispatch (Beta) — send Claude a task from your phone and it runs here, on this computer (lesson 2.7).
- Customize — where skills, connectors, and plugins are managed; lesson 1.11 is all about it.
- Recents — your latest tasks, so you can jump back into anything you were doing.
Now look closer at the slim bar right under the message box — it carries the controls you'll touch most often.
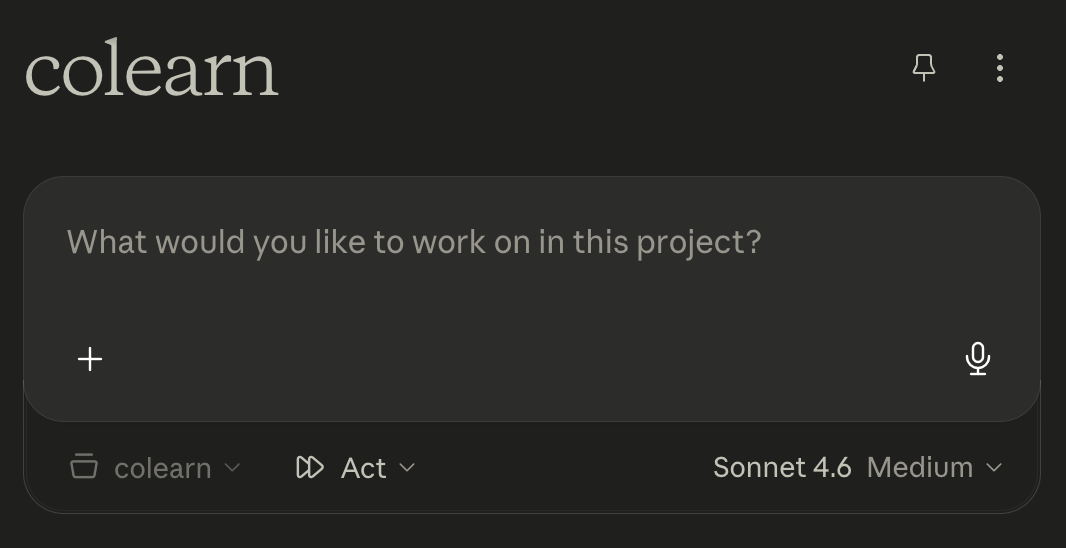
- The
+(bottom-left of the box) — attach extra files or context to a single message. - The microphone (bottom-right) — dictate your request instead of typing.
- The working folder (the colearn chip) — the one folder this session can see and save into (lesson 1.3).
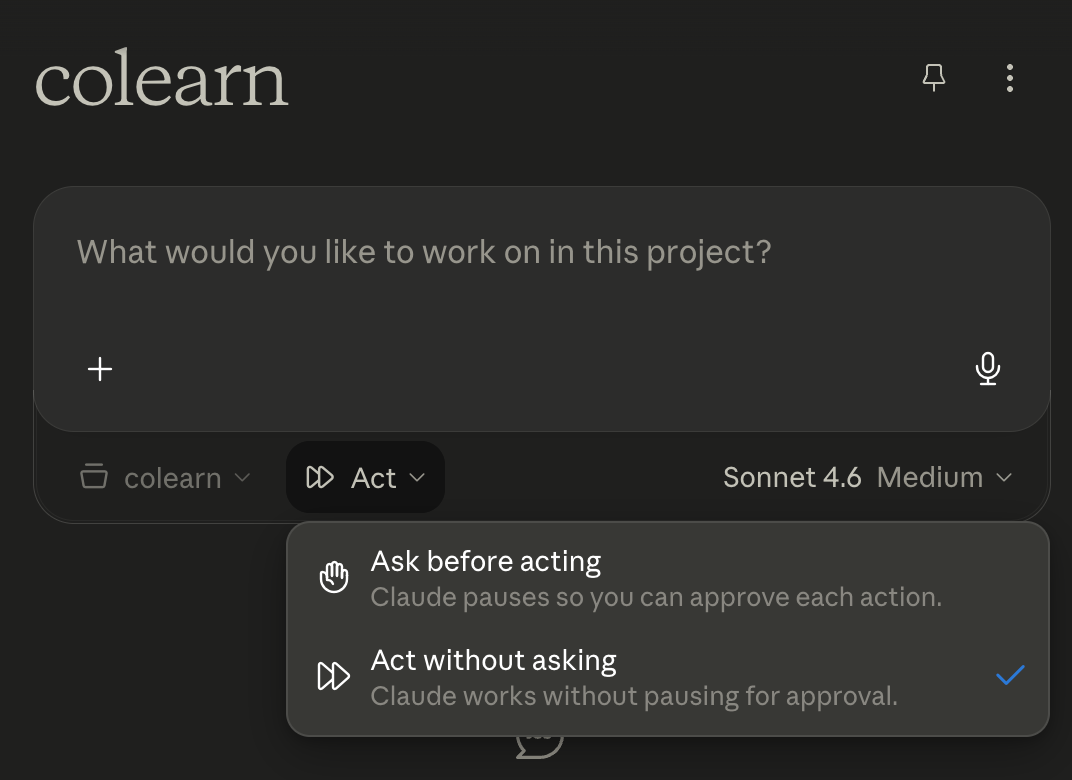
- Mode — how much Claude does without stopping to ask. The next section.
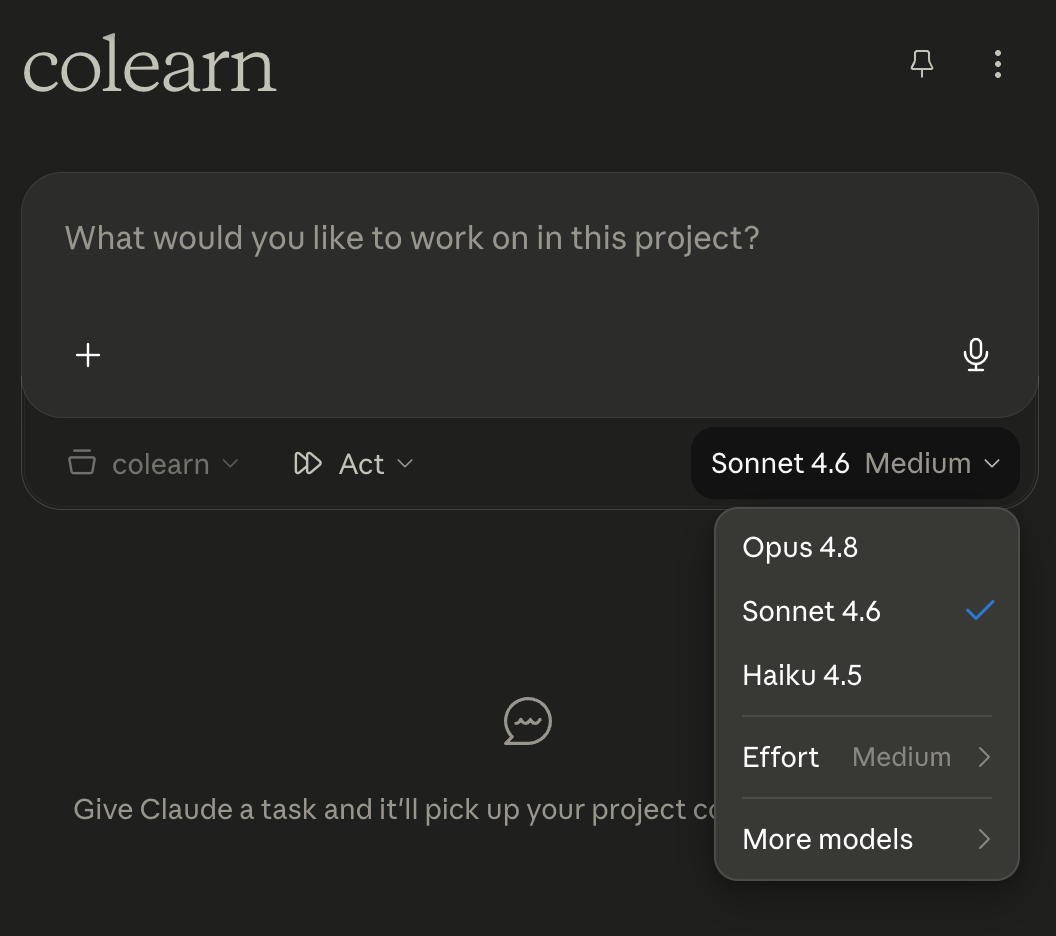
- Model · effort (here Sonnet · Medium) — which Claude does the work, and how hard it thinks. Section 5.
4 · The mode selector — how much leash you give it
Click the mode selector (the chip showing the current mode) and you get two ways for Claude to work. This is the single most important setting for feeling in control, especially at the start. It does not change the folder you granted access to; it changes how often Claude pauses when a step needs explicit approval.
| Mode | What happens | Use it when… |
|---|---|---|
| Ask before acting ✋ | Claude pauses when a step needs your approval — especially outside-world actions such as connected tools, browser actions, or changes beyond the approved working folder. | you're new, the task touches important files, or you want to watch the plan and approvals closely. |
| Act without asking ⏩ | Claude works through the approved task without stopping at every step. Permanent deletion and similarly hard-to-undo actions still require explicit confirmation. | the task is low-risk, well understood, and supervised — ideally a routine you've already watched it handle well. |
5 · Choosing a model (and effort)
Open the model control on the right of the bottom bar and you can pick which Claude does the work — plus how hard it thinks. There's no wrong choice; it's a trade-off between speed and depth.
| Model choice | Think of it as… | Best for |
|---|---|---|
| Opus: the most capable | the senior specialist | the hardest, most tangled jobs: long multi-step work, careful reasoning, big or messy documents. Usually slower and heavier on usage. |
| Sonnet: the default | the reliable all-rounder | almost everything, day to day. Fast and capable — the right pick unless you have a reason to change. |
| Haiku: the fastest | the quick assistant | simple, short, or repetitive tasks where speed matters and you want to spend the least of your limit. |
Effort is a separate dial: how thoroughly Claude thinks before it acts. Higher effort means more careful, better on tricky problems — but slower. For this course, start with the default model at its default effort, raise effort for genuinely hard reasoning, and lower it for obvious tasks. More models simply lets you reach other available models if you ever need a specific one.
Mini-exercise (3 minutes)
Install Claude Desktop if you haven't, open it, and let the workspace finish setting up (on Windows, allow the Virtual Machine Platform step and restart if asked). Then just open the mode selector and the model menu to see the options — don't run a task yet. Leave it set to the default model · default effort and Ask before acting. That's the whole setup — in the next lesson we look at what Claude Cowork actually is and the kinds of work you can hand it.